1. Azure Marketplace
DataKook is available directly from the Azure Marketplace, enabling you to deploy the platform in just a few clicks — entirely within your own Azure subscription.
DataKook offers two plans to match your needs — a free plan for development and evaluation, and an Enterprise plan for full production workloads. Each plan provisions the appropriate Azure resources (App Service, PostgreSQL, etc.) scaled to your requirements.
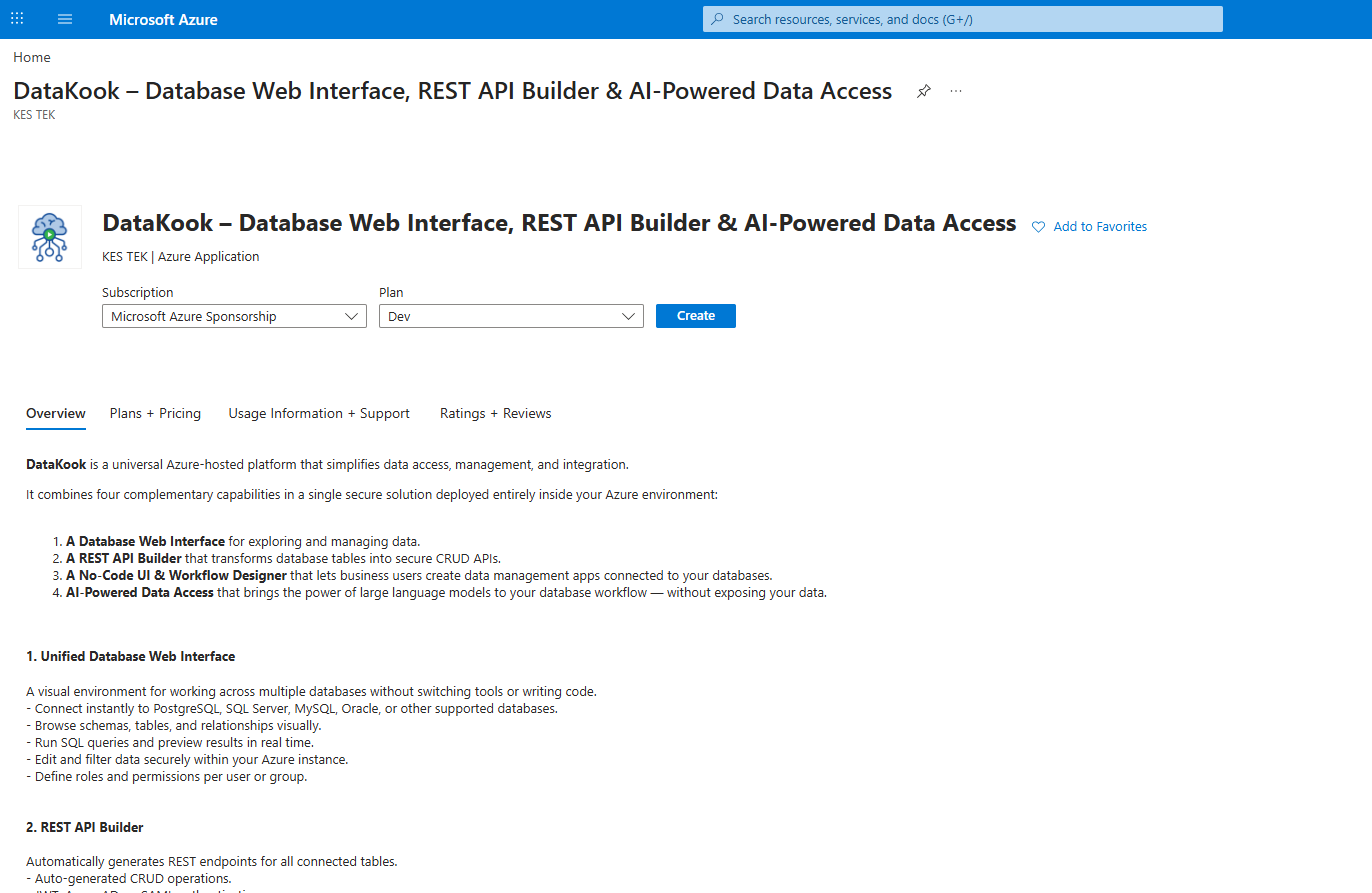
To get started, navigate to the Azure Marketplace, search for DataKook, and select the offer published by KES TEK. Choose your Azure Subscription and the desired Plan, then click Create to begin the deployment wizard.
2. Deployment
The deployment wizard guides you through configuring and provisioning DataKook inside your Azure subscription. Because the application is installed directly in your environment, you have total control over your data, networking, and compliance requirements.
2.1 Select a Plan
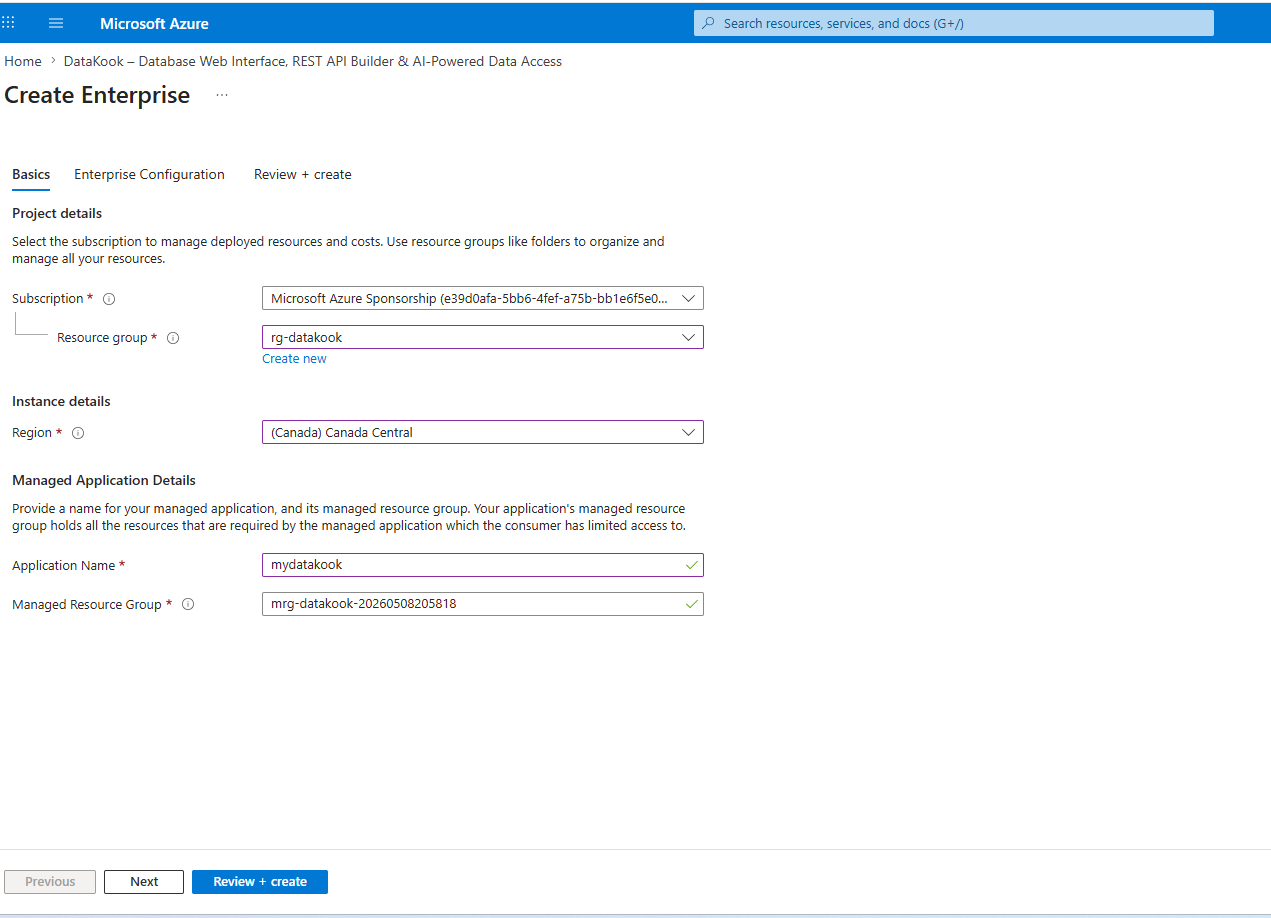
After clicking Create on the Marketplace listing, you are taken to the deployment form. On the Basics tab, configure the following:
- Subscription: The Azure subscription where all resources will be provisioned.
- Resource Group: Select an existing resource group or create a new one to organize your DataKook resources.
- Region: The Azure region where the application will be deployed (e.g., Canada Central, West Europe).
2.2 Application Details
Under Managed Application Details, provide the name for your DataKook instance and the managed resource group:
- Application Name: A unique name for your DataKook deployment (e.g.,
mydatakook). This name identifies the managed application in your subscription. - Managed Resource Group: Automatically generated. This resource group will hold all the underlying Azure resources required by DataKook.
2.3 Administrator Account
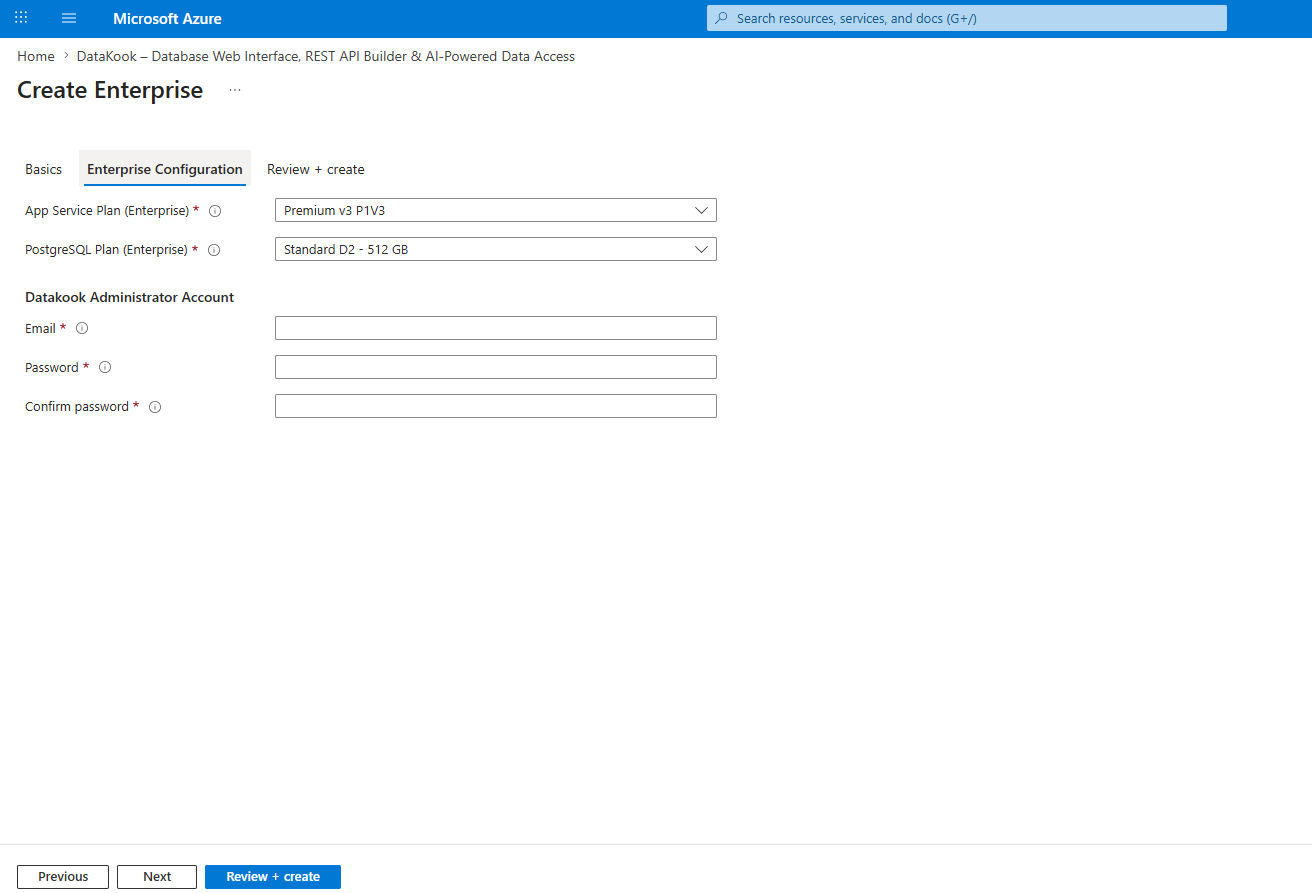
On the Enterprise Configuration tab, configure the infrastructure sizing and the initial DataKook administrator credentials:
- App Service Plan: Select the compute tier for the application (e.g., Premium v3 P1V3).
- PostgreSQL Plan: Select the database tier and storage (e.g., Standard D2 – 512 GB).
Under DataKook Administrator Account, enter the credentials for the first administrator user:
- Email: The email address for the administrator account.
- Password / Confirm Password: Set a strong password for the administrator.
Once all fields are completed, click Review + create to validate the configuration, then Create to start the deployment. Azure will provision all the necessary resources in your subscription.
3. Managed Application
After the deployment completes, DataKook is installed as an Azure Managed Application in your subscription. You can find it in the Azure Portal under your resource group.
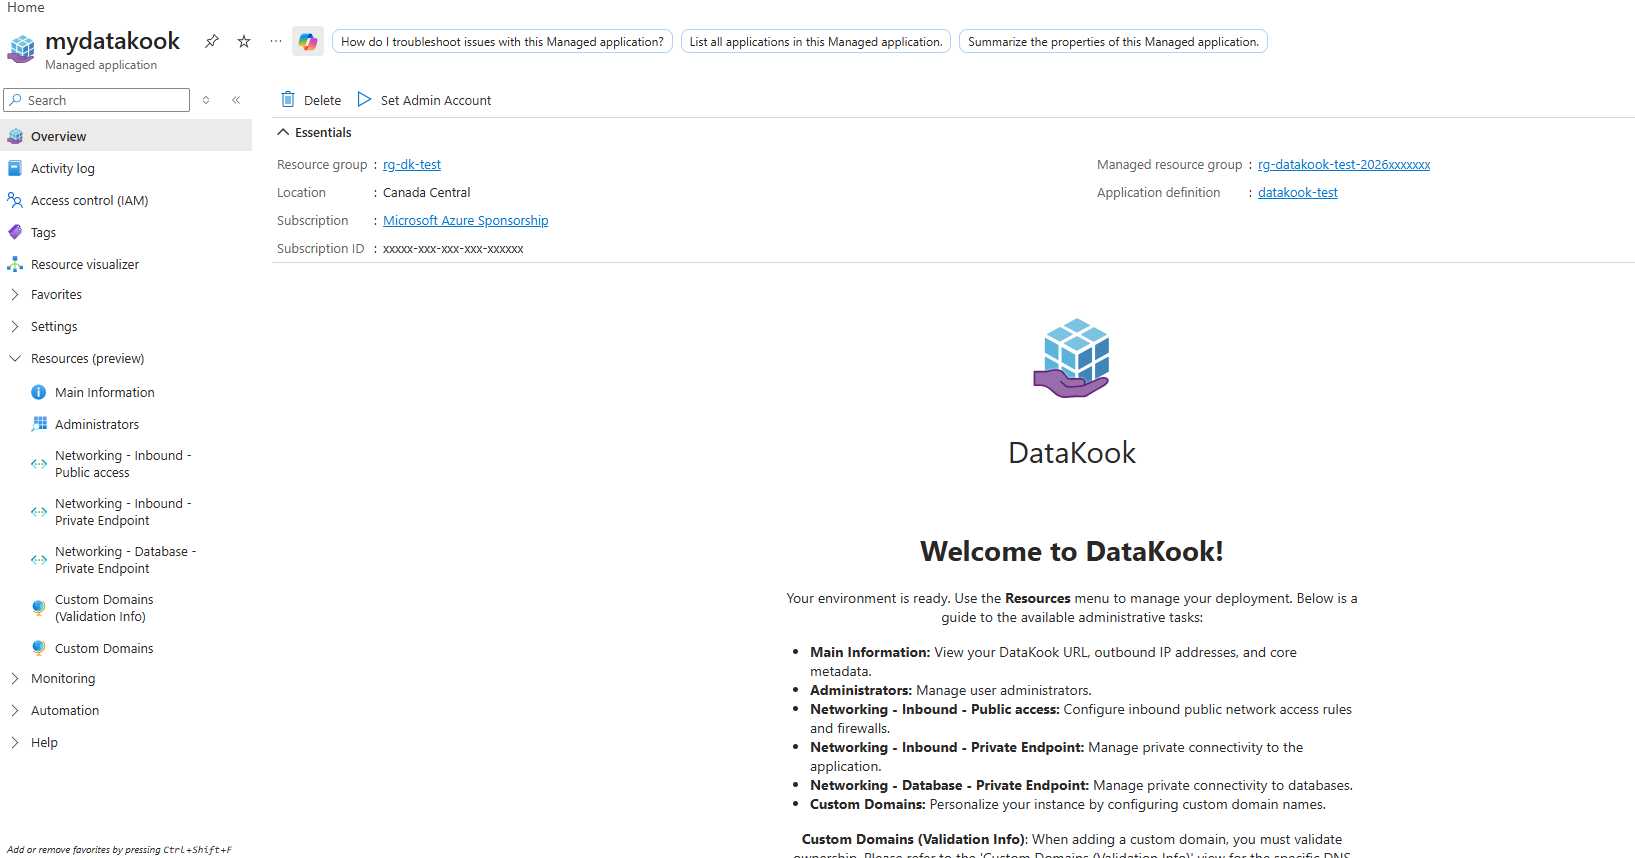
The administrator account you configured during deployment will receive an email containing the full details of your DataKook instance, including the DataKook endpoint URL and initial login instructions.
3.1 Resources Menu
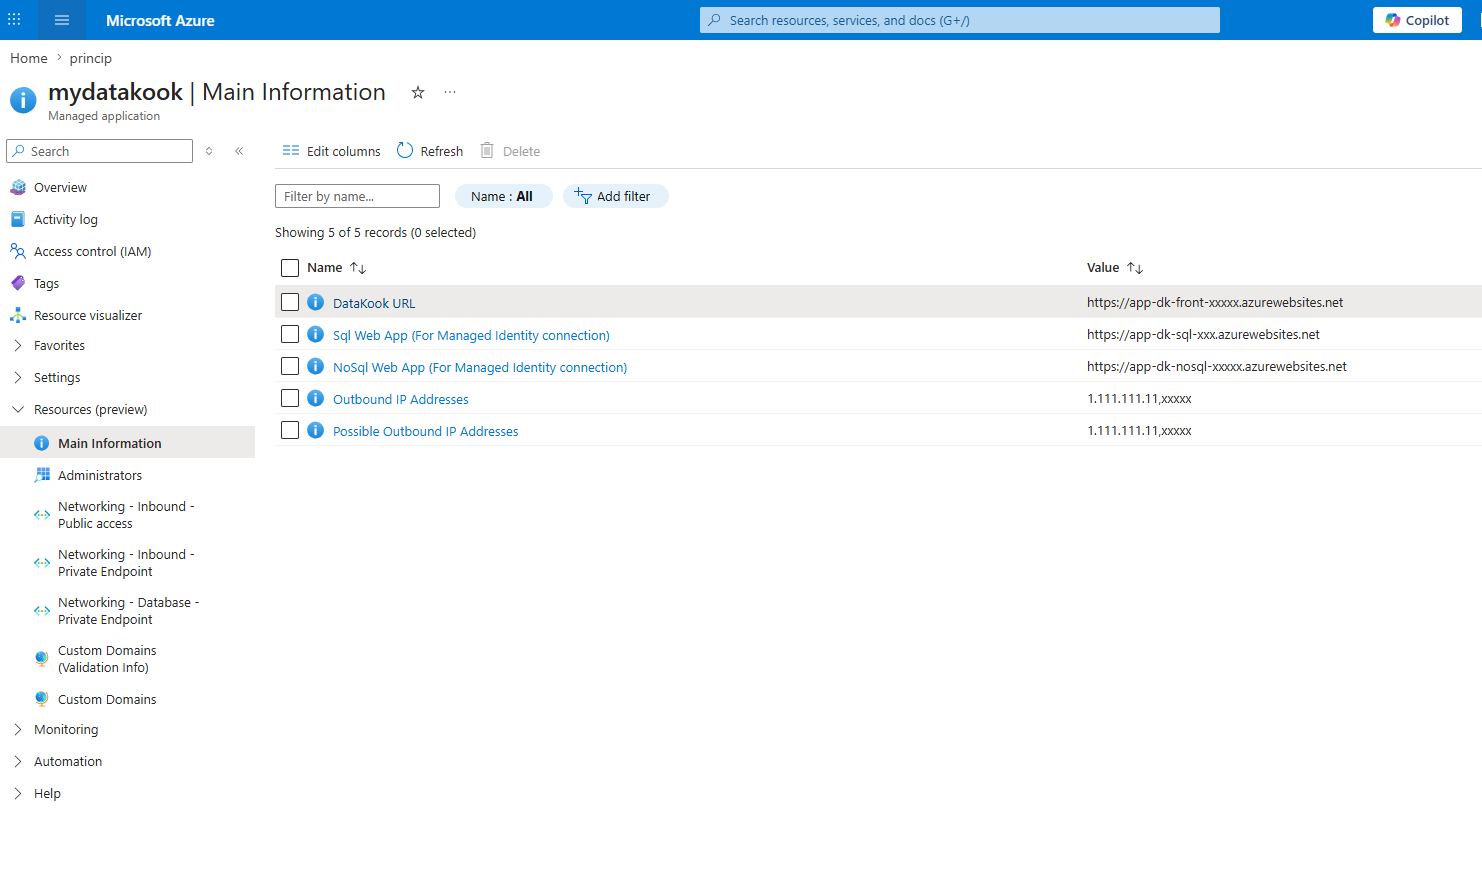
Your environment is ready. Use the Resources menu on the left sidebar of the managed application to manage your deployment. Below is a guide to the available administrative tasks:
| Menu Item | Description |
|---|---|
| Main Information | View your DataKook URL, outbound IP addresses, and core metadata. |
| Administrators | Manage user administrators. |
| Networking – Inbound – Public access | Configure inbound public network access rules and firewalls. |
| Networking – Inbound – Private Endpoint | Manage private connectivity to the application. |
| Networking – Database – Private Endpoint | Manage private connectivity to databases. |
| Custom Domains | Personalize your instance by configuring custom domain names. |
| Custom Domains (Validation Info) | When adding a custom domain, you must validate ownership. Refer to this view for the specific DNS records (TXT / A) you need to add to your DNS provider. |